
Help Centre
In the Help Centre, you’ll find guides, articles, and how-to resources to help you manage your Scrive account.
General information on how to get started. To get started with Scrive you first need to activate your account. If you are an Admin for an account, you have the benefit of managing and optimising the work environment within your designated user groups.
You can read more in our Help center
In the Help Centre, you’ll find guides, articles, and how-to resources to help you manage your Scrive account.

Our AI chatbot is available 24/7 and will help you answer any question regarding Scrive. You will also have the possibilty to connect with our Customer support team through the chat.
The chatbot is available on scrive.com and Help Centre.
You need to accept marketing cookies to see the video.
Have a look at this video to learn the basics of e-Signing with Scrive. By using Scrive you can:
✓ Get a better customer experience
✓ Save time, money and paper
✓ Increase efficiency
You need to accept marketing cookies to see the video.
Brand your Scrive eSign experience with your colours, logo, and messaging (not included in Essentials price plan). Branding makes it possible for you to customise the eSign experience for both your Scrive users as well as customers with your own colours, logo, and messaging. To customise the branding for your account, navigate to Account > Branding in the main menu to your left. When you are happy with your settings, click Save.
Read more about branding in our Help center
You need to accept marketing cookies to see the video.
To set up data retention policies, log in to eSign Online and navigate to Account > Data retention. For instance, you can set an automation for moving withdrawn documents to Trash automatically after a chosen number of days. Updates to your retention settings will take up to 24 hours to become effective. If a person who has signed one of your documents also has a Scrive account, their copy of the agreement will not be deleted, even if yours is.
If you want to set a global retention policy for your entire organisation, reach out to customer support. This means that users can only set stricter rules (a shorter retention period) than the company policy.
Read more about data retention in our Help center
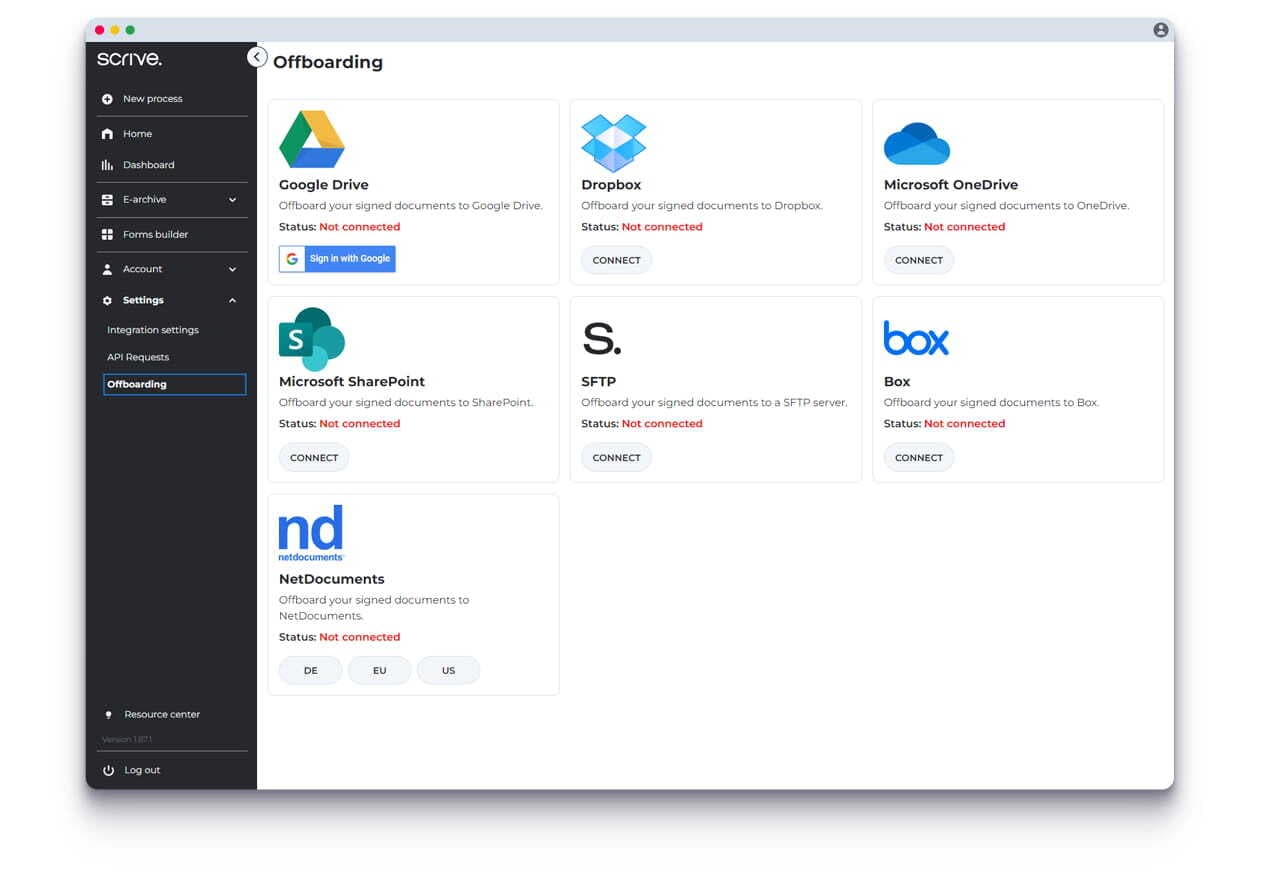
This guide will tell you how to automatically offboard sealed documents to any of the offered cloud storage services listed below.
Read more about offboarding in our Help center
You need to accept marketing cookies to see the video.
eSign Online is Scrive’s online portal. Send, sign and manage your agreements wherever you are, on any device. The entire signing process is a few simple steps.
You need to accept marketing cookies to see the video.
Templates make it easy to save time with your standard agreements and other repeatable signing processes. You can save the signing workflow settings using a process template, or you can save the document with a document template.
Process templates let you automate workflows when you have agreements where the content changes but the workflow settings remain the same. Document templates are for workflows where the agreement doesn’t change but some aspects of the workflow do.
To create a new template, simply press NEW TEMPLATE under Templates in your E-archive.
Read more about templates in our Help center
You need to accept marketing cookies to see the video.
Read more about process and document templates in our Help center
The evidence package is attached to each document signed through Scrive and provides a detailed record of when and how the signing occurred. This evidence package can be used to prove the legal validity of a signed document.
Read more about the evidence package on our Help center
You can also verify a document’s authenticity by uploading to make sure it hasn’t been compromised. Verify a document here
Visit our Trust centre to learn more about the legal durability of Scrive documents, our unique digital sealing method, blockchain security and more.
To remove a user, navigate to Account > Users and Groups and find the user you wish to delete in the list. You can click on the headers in the list to sort amongst users or use the search function.
To delete the user, click on the waste bin icon to the right of the user name and then click OK. A message will show up saying “The account was successfully removed”.
Keep in mind that when removing a user the documents will no longer be visible within Scrice. Make sure you download the documents before deleting a user, OR that you have an admin placed in the same group as the user. An Admin will always see the documents from deleted users if they are in the same user group.
When deleting a user, their associated documents will not be removed. Documents linked to the deleted user will still be available in the E-archive of the user group belonging to the company account. This means that the Admins of the user group in question will continue to have access to the documents.
To change your account information, navigate to Account. Here you can edit your user related information like name, mobile phone number, email address, password, ID number, position, and language.
If you are an admin, you can also edit your company information. If you are not an admin you can view it, but not edit it. If you find that this information is incorrect, please contact any of your admin users, and they can help you edit the information.
You can also perform this change by clicking on the user name in the list on the Users tab. Click Edit by the user group setting and move the user to the new group. Click Save to complete the transfer.
If a user has created a free trial user or an account on their own, they will not be visible within your own company structure. If you would like to move them to be a part of your user group, simply add them as a new user. The user will now need to confirm the change through the activation link sent to their email before the transfer is completed.
Under your Account settings you will find your personal information, and your company information. If you are not an admin, you will find that the company information is only available for you to view, and not edit. If you find that this information is incorrect, please contact any of your admin users, and they can help you edit the information.
As a standard user, you can only see your own documents. However, there are different ways for you to grant access to see the documents of other users and in other groups, depending on your needs.
If you promote a user to an Admin, they will be able to see all documents of all users in their current user group.
Select a template from the Templates list and then click SHARE to make it available to your colleagues. Other users in your user group will now be able to use the same template. However, you are the only one who can edit or delete it.
To stop sharing a template with others, simply re-do the same steps and press UNSHARE.
You can also transfer your templates to another user. To do so, please contact our support.
By setting one or more of your users as an Admin User in the top of your hierarchy, you ensure that you can use the product more independently from Scrive, since you yourself can add, delete, and move users, edit information etcetera. It’s also important to have an admin in each group or a top level Admin in the account structure when it comes to have access to documents from a deleted user. For example, If a user in a group is deleted the Admin of that group will get access to the document from the user after it’s deleted.
Yes, you can! With our popular integration to Microsoft Office, you can smoothly send your documents for signing directly from Microsoft Word, either through the templates you have set up, or through completely new processes.
Scrive has integrations to many systems for all parts of your organization, like CRM systems, HR tools, legal systems, and many more. Make sure to visit our integration site, or ask support or your Customer Success Manager about your systems.
Read more in our Help Center